
TDS Page
HMI: Pressing the button allows all the buttons on these HMI panels to control all the equipment on the top drive.
Joystick: The button sets the control for the top drive on the joystick, and it blocks all the buttons that can be controlled by the joystick on this panel on HMI (FLOAT buttons and STOP ROTATION button). It acts as an Interlock.

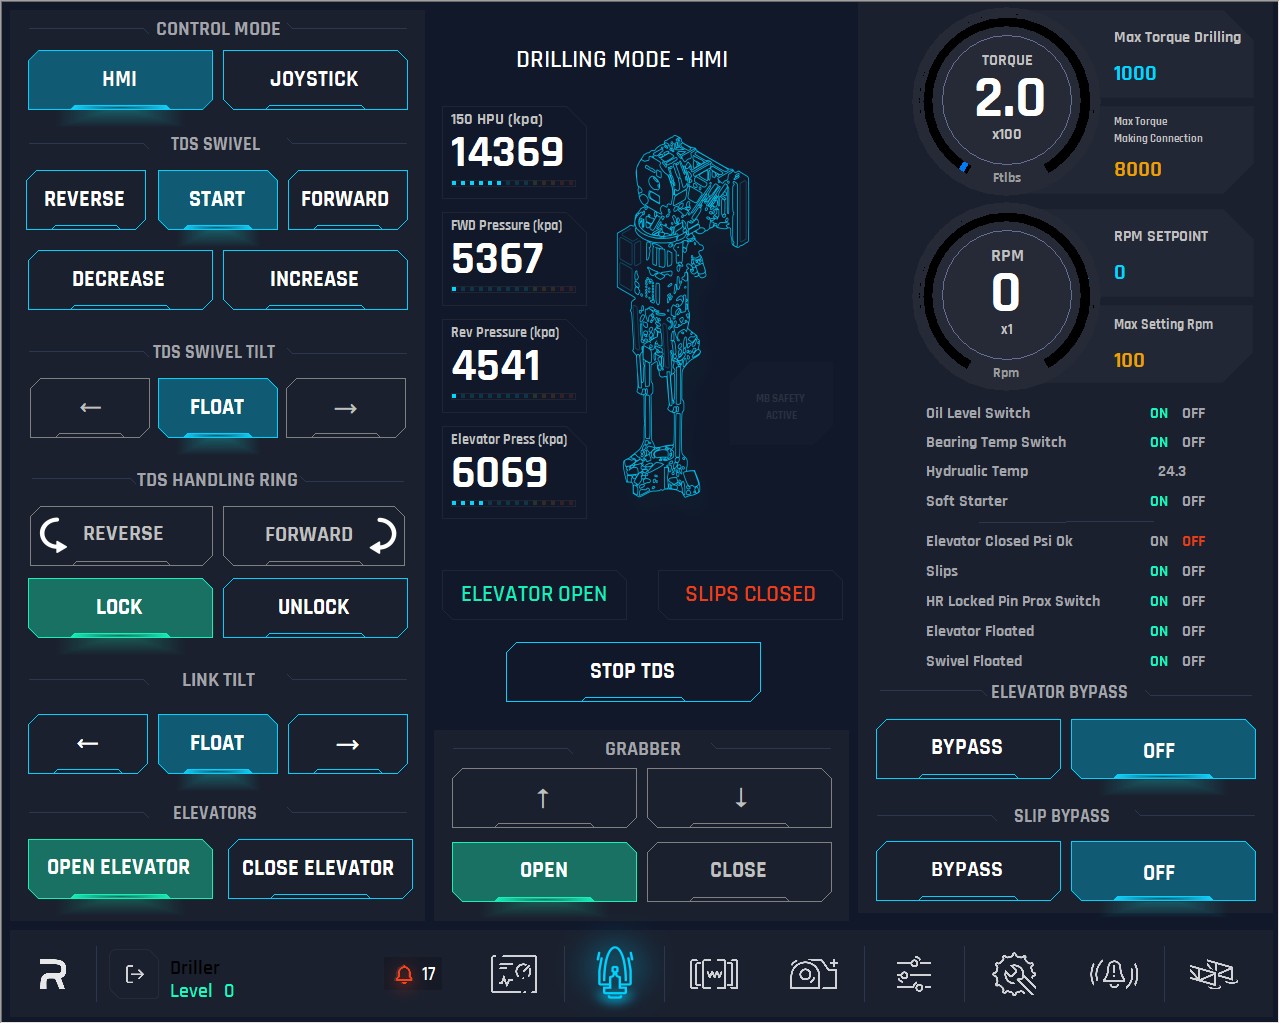
TDS Swivel: On this part user can control Swivel with the HMI.
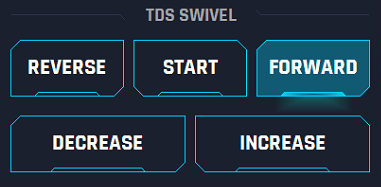
Forward: Pushing this button will start the Swivel rotation in forward direction. This button must be selected before START rotation. To change the direction of the rotation from FORWARD to REVERSE or vice versa, the user needs to STOP TDS rotation and change the direction (Acting as Interlock), otherwise the system will not do anything if user tries to press REV button while rotating FORWARD or vice versa. If user tries to change the direction without pressing STOP TDS ROTATION a window will pop up “To change TDS direction, please STOP TDS ROTATION first".
Reverse: Pushing this button user will start the Swivel rotation in reverse direction. This button must be selected before START rotation. We should also consider that all reverse rotations should be automatically limited to 20 RPM. To change the direction of the rotation from FORWARD to REVERSE or vice versa, the user needs to STOP TDS rotation and change the direction, otherwise the system will not do anything if user tries to press REV button while rotating FORWARD or vice versa. If user tries to change the direction without pressing STOP TDS ROTATION a window will pop up “To change TDS direction, please STOP TDS ROTATION first".
START: This button starts the rotation for the Swivel and go to 20 RPM to the direction before selected.
Increase: This button will increase the current RPM by 5 RPM when the user pushes it. Hold the button for 3 seconds and the TDS will go to the maximum speed setpoint.
Decrease: This button will decrease the current RPM by 5 RPM when user push it. Hold the button for 3 seconds and the TDS will go to the minimum default speed (20rpm).
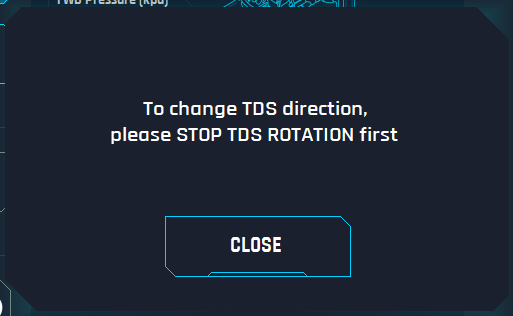
TDS Swivel Tilt: This section controls the Swivel Tilt by the HMI.
Retract: To retract push and hold this button till the swivel tilt reaches the desired position. The system will stop moving it when the button is released.
Float: Click on this button sends a command to release the pressure from hydraulic cylinders allowing the equipment to float.
Extend: To extend push and hold this button till the swivel tilt reaches the desired position. The system will stop moving it when the button is released.
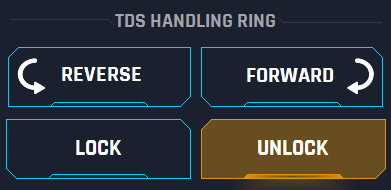
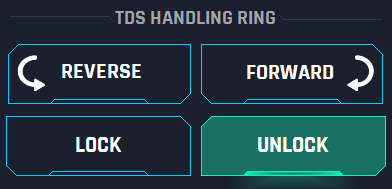
TDS Handling Rig: This section controls the Handling Ring.
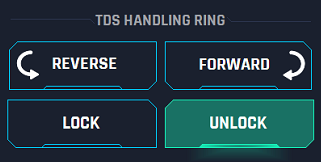
Reverse: To rotate in reverse direction, user has to push and hold the button. If it is not being pushed rotation stops.
Forward: To rotate in forward direction, user has to push and hold the button. If it is not being pushed rotation stops.
Lock: To lock the handling ring, user has to push this button. It will become yellow to indicate the start of action and green colour when the proxy sensor confirms the handling ring lock pin is in position and locked. After this, the Reverse and Forward buttons must be locked. (if proxy is not confirmed lock, then rotation is allowed)
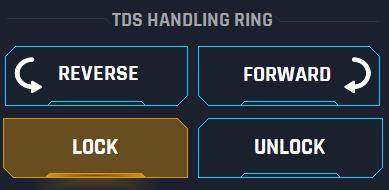
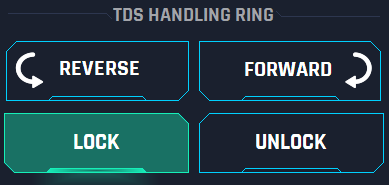
Unlock: This button must be pressed by the user when the control ring needs to be unlocked. The button will become yellow to indicate the action has started and green colour when the proxy sensor confirms the handling ring lock pin is in out of position and unlock. After this, Reverse and Forward buttons will be unlocked and available to use.
Link Tilt: This section controls the Link tilt
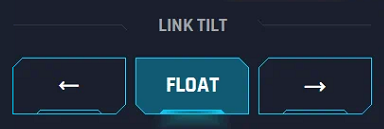
Retract: To retract push and hold this button till the link tilt reaches the desired position. The system will stop moving it when the button is released.
Float: Click on this button sends a command to release the pressure from hydraulic cylinders allowing the equipment to float.
Extend: To retract push and hold this button till the link tilt reaches the desired position. The system will stop moving it when the button is released.
Elevators: User can open and close the elevators from this panel
Open: Click on this button will open the elevators. The button will be highlighted with green colour.

Close: Click on this button will close the elevators. When pressed, it should turn yellow and then red once confirmation pressure has been reached.


Grabber: The grabber can be controlled by these buttons on HMI.
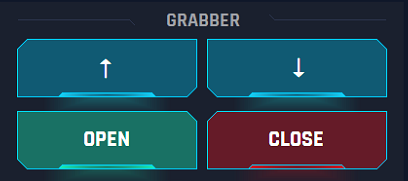
UP: To retract push and hold this button till the grabber reaches the desired position. The system will stop moving it when the button is released.
Down: To retract push and hold this button till the grabber reaches the desired position. The system will stop moving it when the button is released.
OPEN: Click on this button will open the Grabber. This button will be highlighted with green colour.
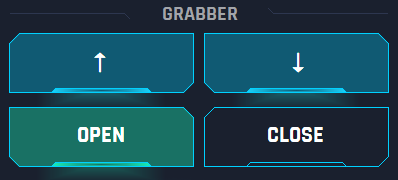
Close: Click on this button will close the Grabber. This button will be highlighted with red color.
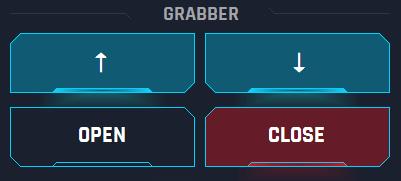
This must be interlocked, for RH pin in lock and TDS not rotating.
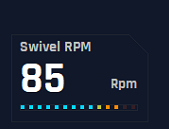
Swivel RPM: This is a display to show the current RPM
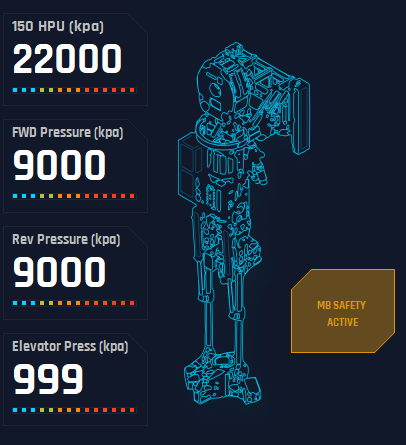
10. 150 HPU: This display shows the current pressure of the 150 Hydraulic power unit (TDS robotics pressure).
11. Forward Pressure: This display shows the current pressure of the forward movement.
12. Reverse Pressure: This display shows the current pressure of the reverse movement.
13. Elevator Closed: This is an indicator to show the status of the elevators, open or closed. When closed, the indicator will be red, when open indicator will be green.
14. Slips Open: This is an indicator to show the status of the slips, open or closed. When closed, the indicator will be red, when open indicator will be green.
15. MB SAFETY ACTIVE: This will be highlighted when MB safety interlock is activated.
16. Stop TDS: The button stops rotation of the TDS. In case of Swivel rotation, user need to stop the rotation by this button to change the direction of rotation when using the manual mode. The button Stop TDS Rotation remain active independent if Manual or Joystick mode is used.

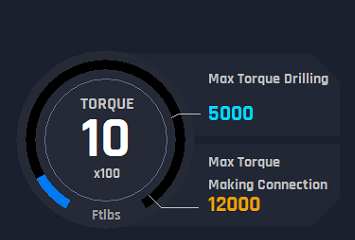
17. Torque Dial: This dial shows the current value of the torque.
18. Max Torque Drilling: This is a display to show the current Max Torque allowed/set for Drilling.
19. Max Torque Making Connection: This is a display to show the current Max Torque allowed/set for Connection
20. RPM dial: This is a display to show the current RPM value.
21. Max Setting RPM: This is a display to show the max RPM TDS can reach.
22. Elevator Bypass: This is a bypass feature to select when rig is not using the main hydraulic elevators and changed the type of elevators. The elevators (hydraulic) are part of an interlock process controlling the drawworks. There is an interlock where elevators and slips can be closed at the same time, or one open and the other close, but both cannot be open at the same time. So, this bypass disables the elevator from the interlock.
Bypass button: activate the bypass and work as mentioned before.

OFF button: Disables the bypass, and it adds the elevator again to the interlock.

23. Slips Bypass: This is a bypass feature to select when rig is not using the slips, or they changed the type of slips. There is an interlock where elevators and slips can be closed at the same time, but both cannot be open at the same time. So, this bypass disables the slips from the interlock.
Bypass button: activate the bypass and work as mentioned before.

OFF button: Disables the bypass, and it adds the elevator again to the interlock.