
Configuration_v2.
On the Configuration, a user can change the settings of the CyberloopEDR application. There are three different tabs Well, Charts, and Export available in the Configuration.
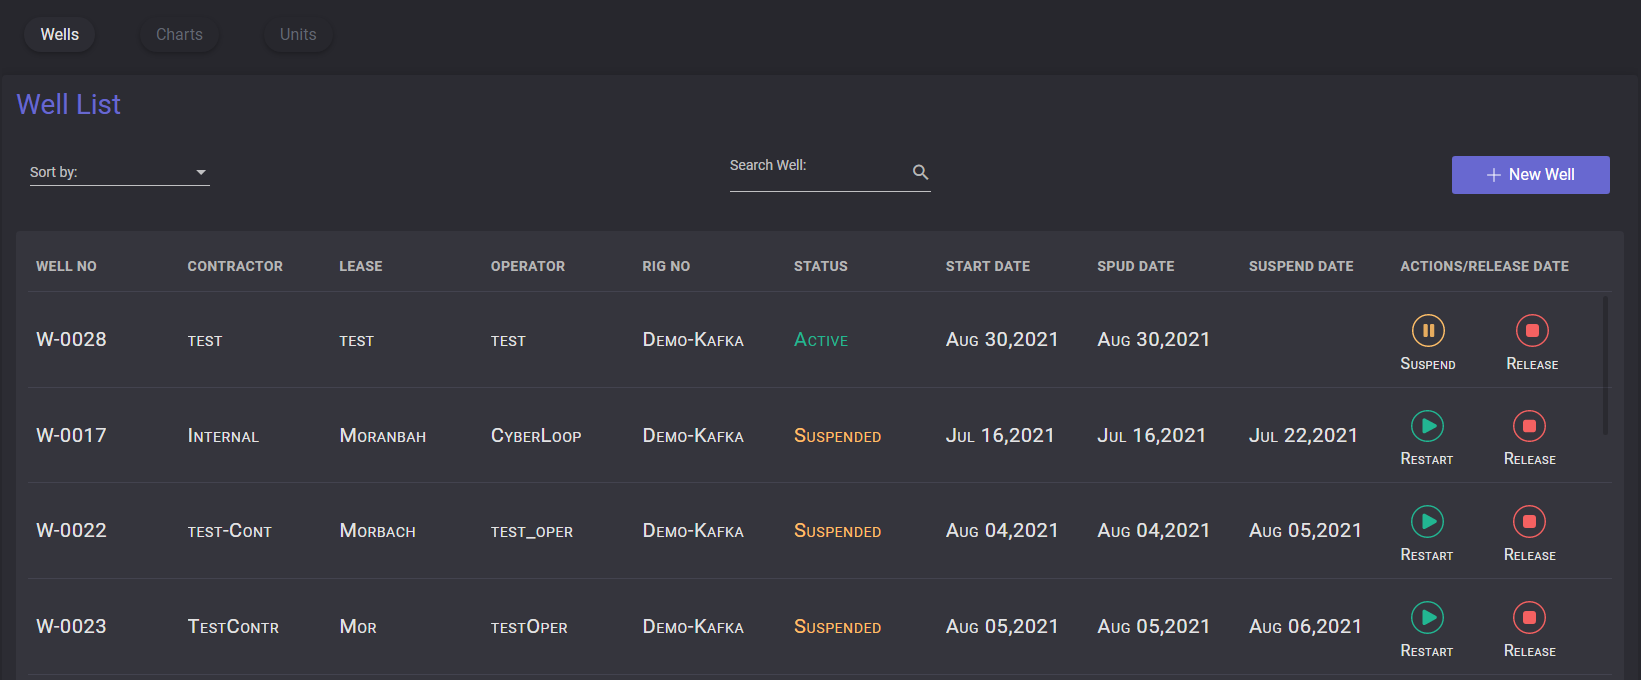
Wells
On the Wells page the user can view and manage the list of drilled wells and well sections. In the table are listed existing wells and major properties: Well Number, Contraсtor, Lease, Operator, RIG Number, Status, Start Date, Spud Date, Suspend Date.
In the Actions/Release date column can be changed the status of the well. An active well can be suspended or released. The suspended well is paused and can be restarted rather than the released well is stopped and cannot be restarted.
The well list can be sorted by well №, contractor, rig №, status, and start date.
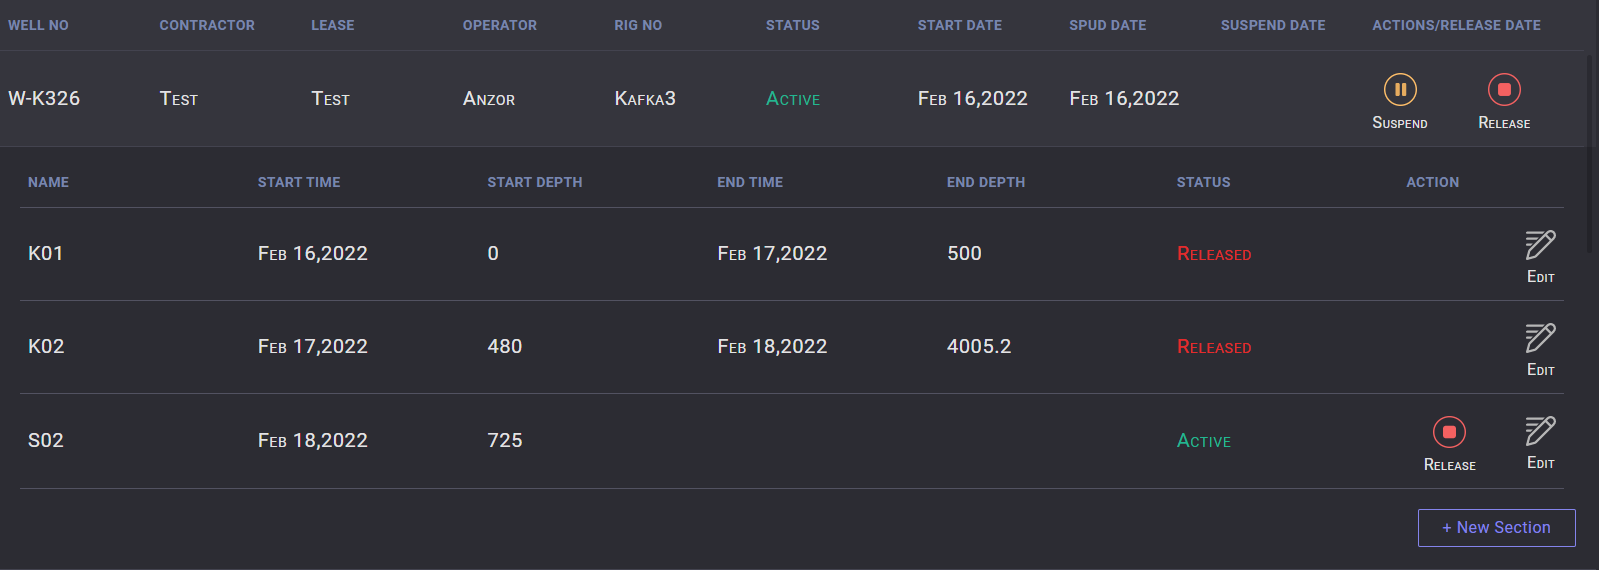
Sections
Sections of the Well can be viewed by clicking on the row of the well. An expanded table contains the list of selected well with the following data: section name, start time, start depth, end time, end depth, and status.
New section can be added to the currently active Well. By clicking the New section button in the sections list. In the modal window should be added section name and start depth. A new section can be started only when the previous section has been released.
To stop the currently active section click on the Release button next to it. In the modal window specify end depth if it is necessary and click Release.
To change the parameters of the section click on the Edit button change name or depth values and click Save. Both, released and active sections can be edited.
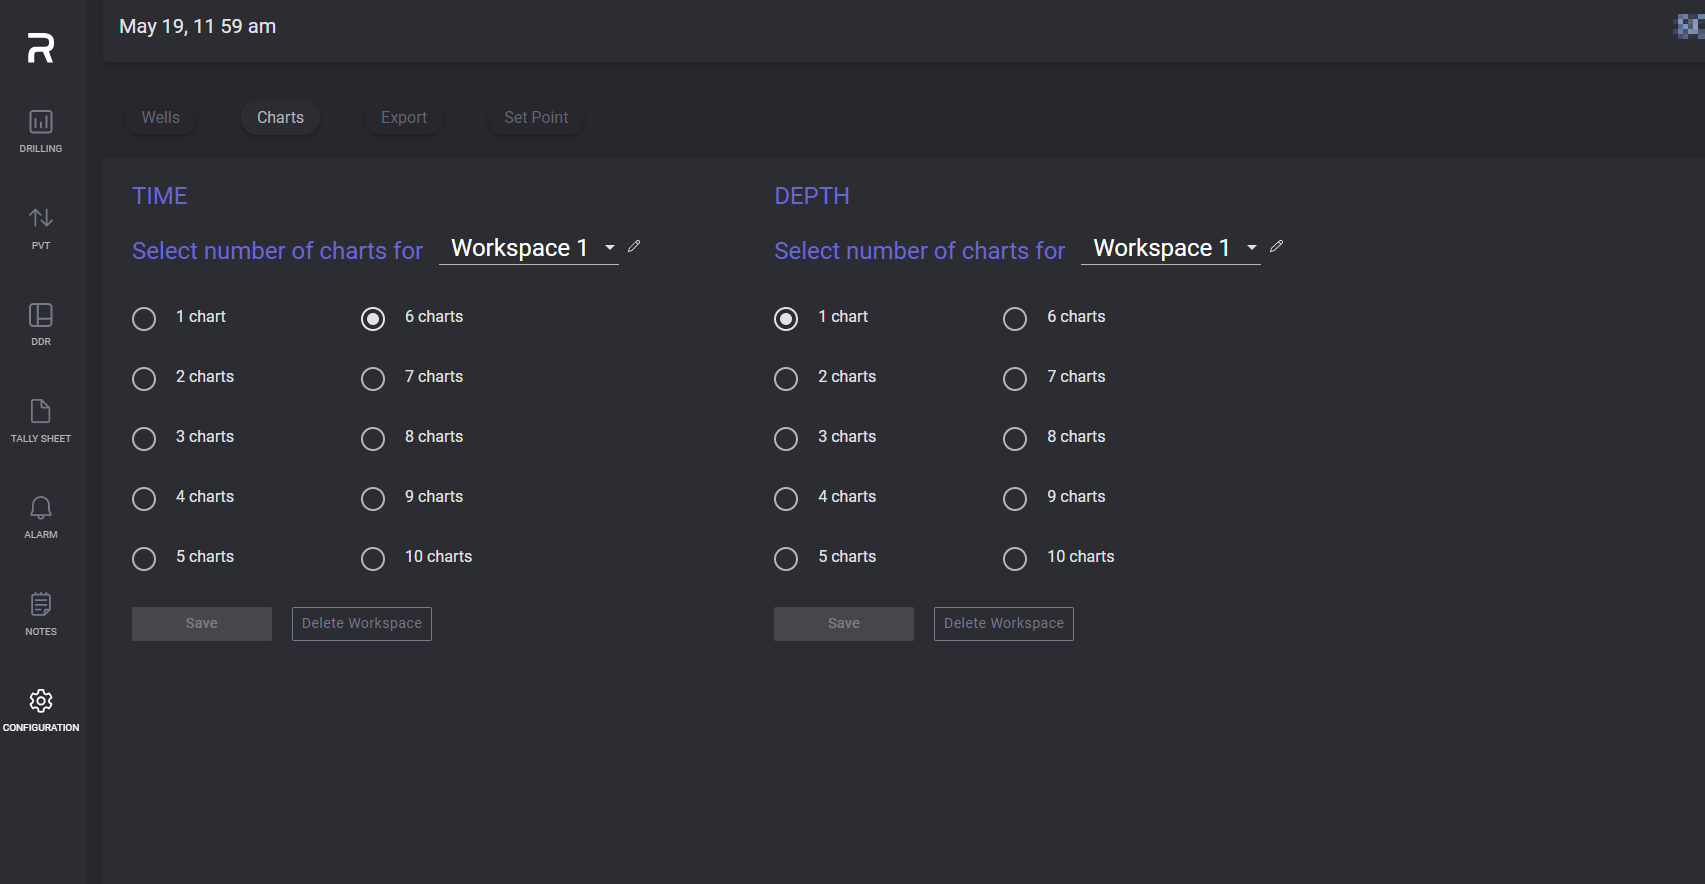
Charts
On the Charts tab drilling workspaces can be edited or deleted. There are two workspace settings blocks on the page for time mode and depth mode workspaces.
To change the number of charts of the workspace select the necessary workspace from the dropdown list, set the number from 1 to 10, and click on the Save button.
The title of the workspace can be changed by clicking on the pencil icon. In the opened modal window enter the title of the workplace and click on the Change button.
To delete workspace select the necessary workspace from the drop-down menu on the Settings tab and click on the Delete Workspace button.
Export
On the Export tab can be downloaded .csv or .las file with traces data.
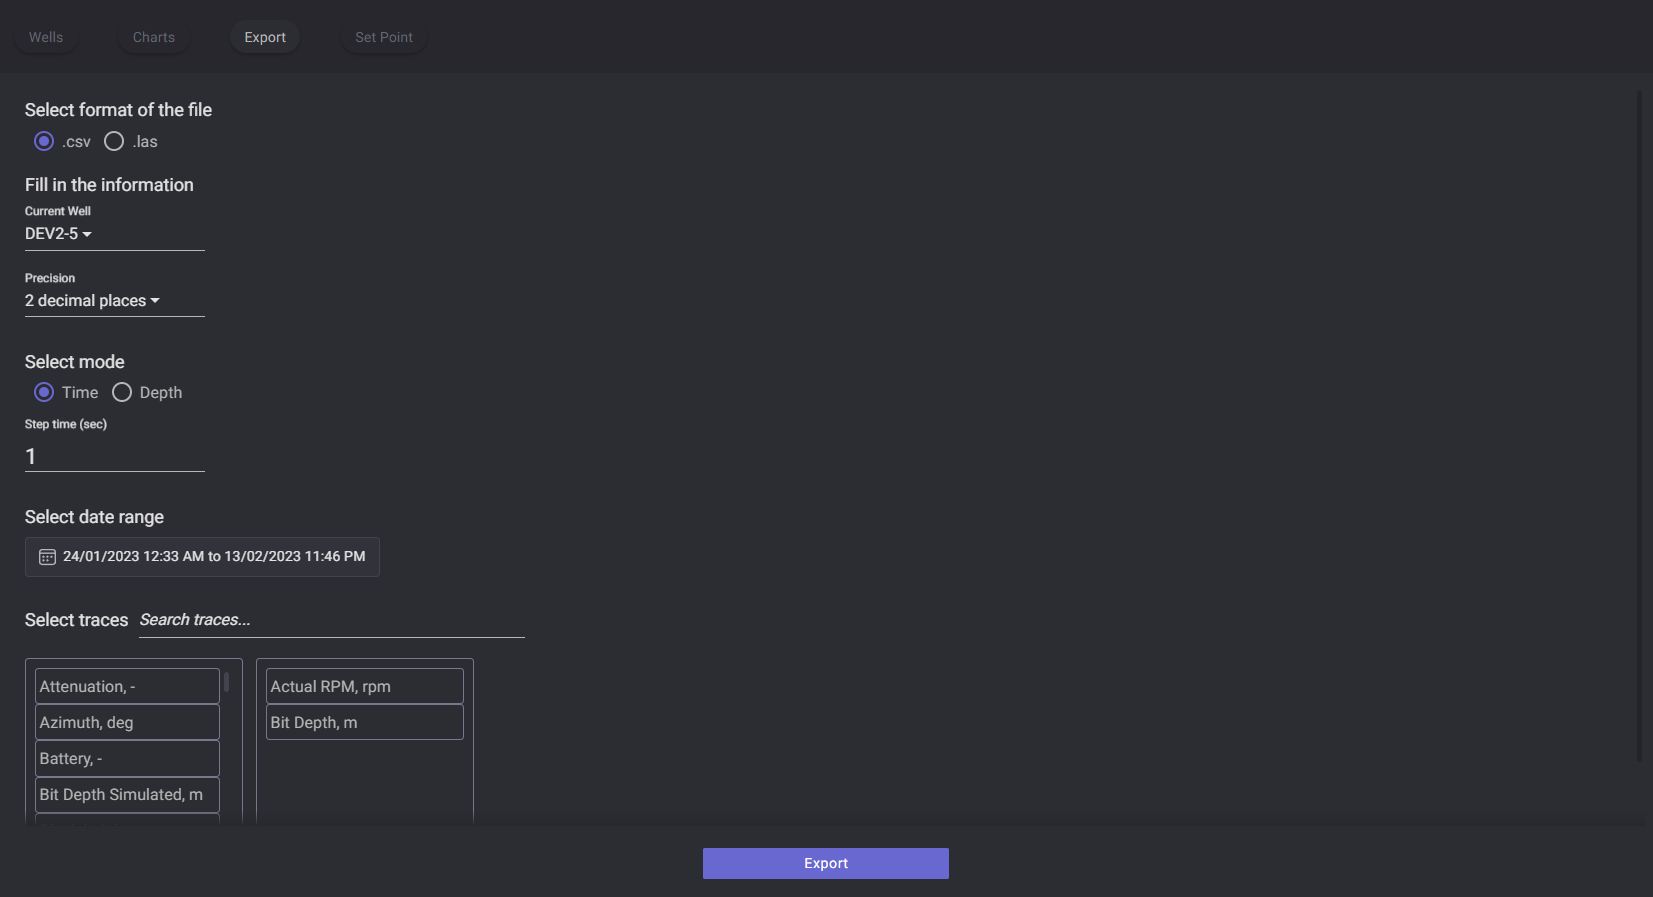
Before export select the format of the file. To change the Well for export click on the Current Well field and select from the drop-down list another well. The accuracy can be defined in the precision by clicking on the field and selecting proper precision from the list.
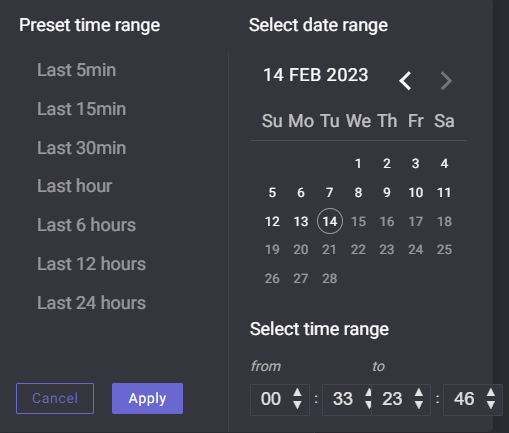
Selected mode defines the format of the data that will be exported. If the Time mode selected the step time (in seconds) and date range should be specified. In the date picker can be selected preset time range or the date and time range can be defined manually.
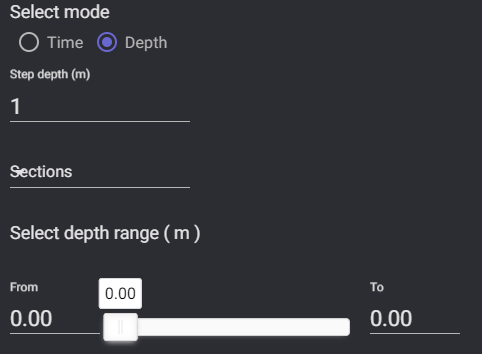
If the depth mode selected the step depth (in meters), section and depth range should be defined. Depth range can be defined by entering limiting values to the fields or by dragging the slider.
Traces that will be added to the exported file should be dragged from the lift to right box.
Click on Export button starts the export of the file.
Set Point
