
CyberloopEDR Workspace Components_v2.
The CyberloopEDR application consists of the main window and top, bottom, and side panels. The top panel shows the current date and time, RIG number, and well number.
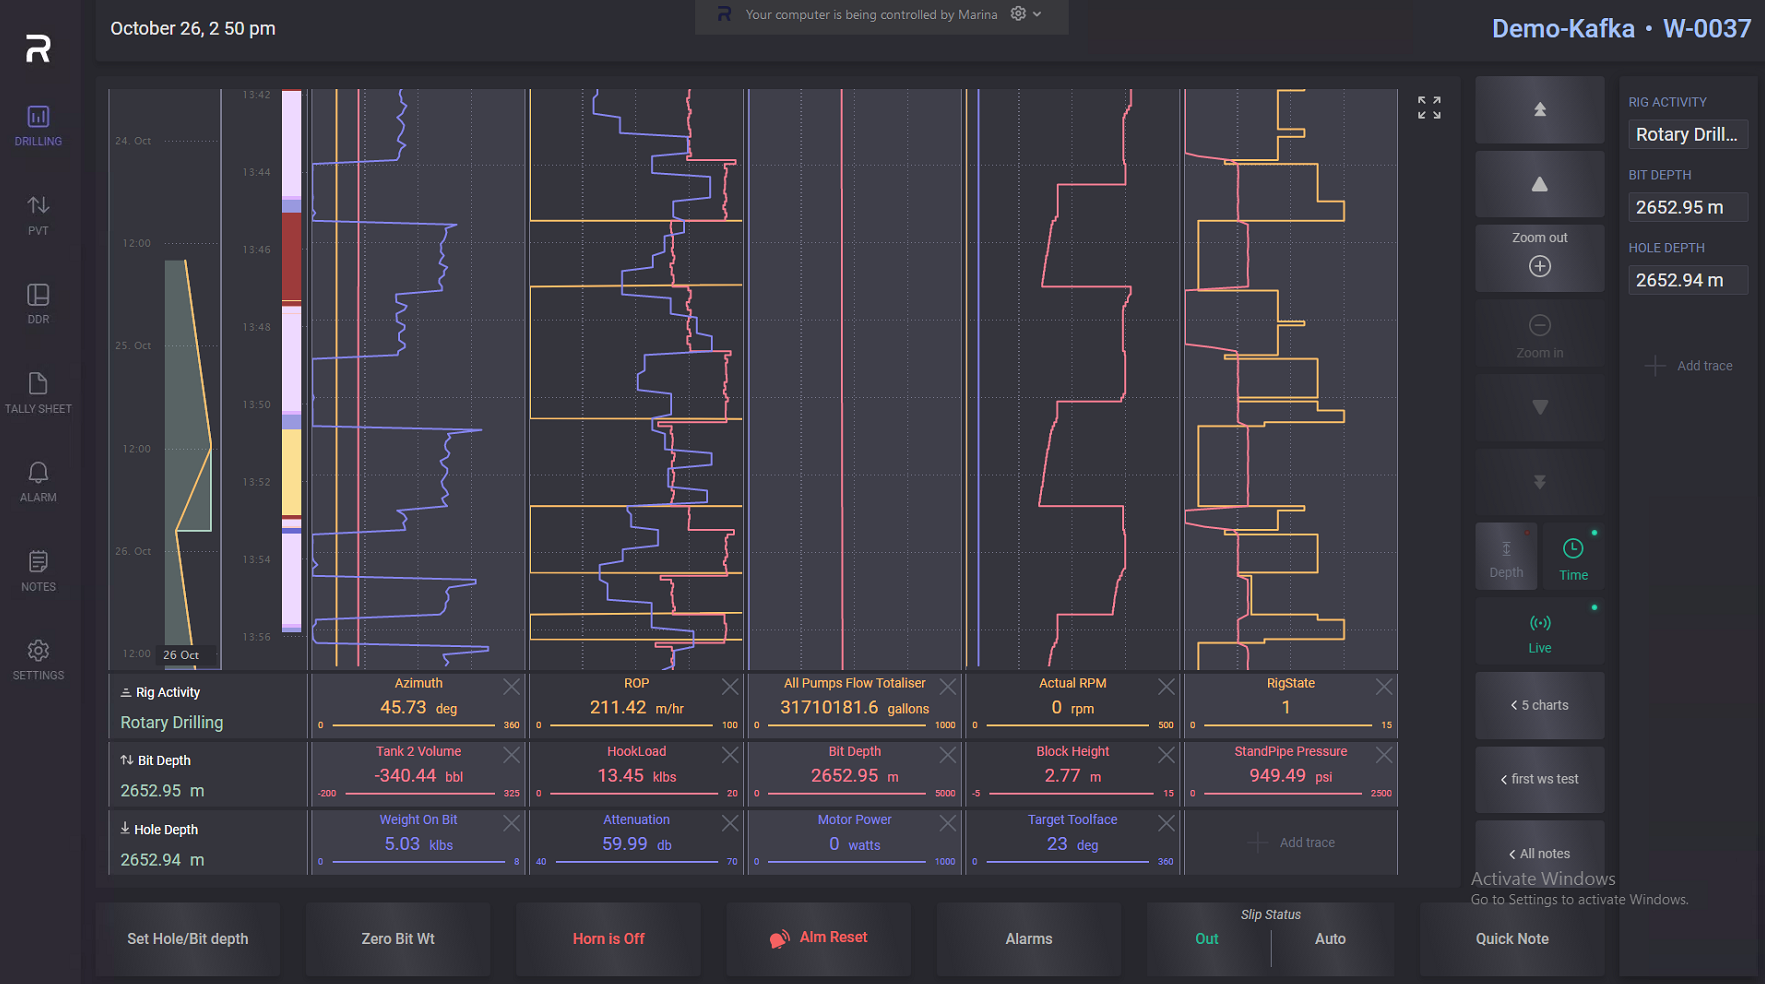
On the left side panel, a user can select the functionality to present in the main window: Drilling, PVT, DDR, Tally Sheet, Alarm, Notes, and Configuration.
Main traces are presented on the right panel. The RIG Activity, Bit Depth and Hole Depth parameters always displayed on the panel. Other parameters to track can be added by clicking Add trace button. In the opened modal window select one or several parameters to display and click on Add button.
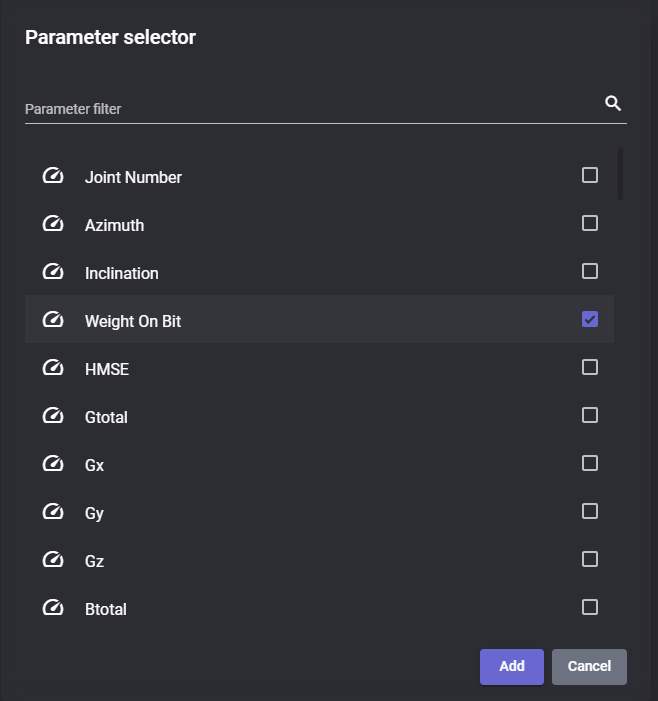
The selected parameter will appear on the right panel. It can be deleted from the panel by clicking on the X-button in the parameter window.
On the bottom panel placed the set of buttons for fast change the parameters or turning off/on the functionality.
Depth
Click on Depth option on the bottom panel opens modal window where Bit, Hole, or Shoe depth can be changed. Enter value to the field of the parameter to be changed and click apply to use new value. New values will be displayed on the right panel.
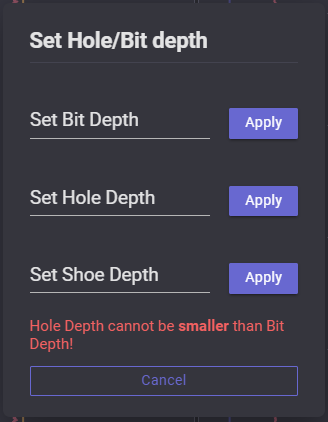
Note: the Hole depth cannot be smaller than Bit depth. If entered values violate this condition the field will be highlighted with red.
Rig Activity
Click on current Rig Activity on bottom panel expands the panel to select Rig Activity manually. Click on one of the options switched the activity.
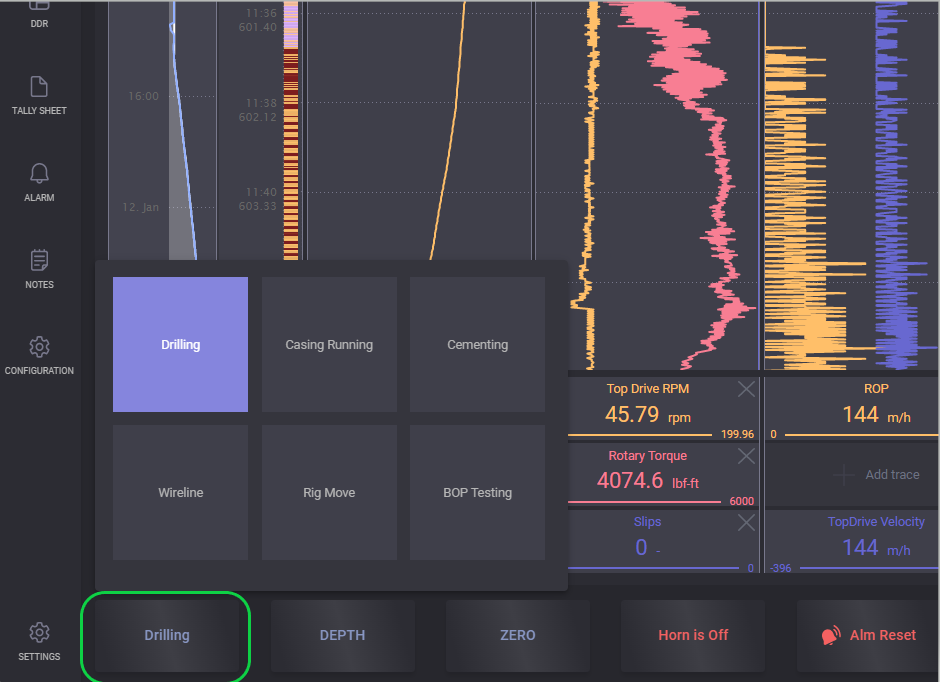
There are six activities available:
Drilling – normal Drilling operation. Bit depth and hole depth tied to block height and slips conditions;
Casing Running – Bit depth does not change when Casing running mode is selected. The shoes depth is progressed as the casing is run in hole. Activity avoids the issue of casing and liner runs pushing the hole depth accidentally.
Cementing – used when pumping and waiting on cement. Activity does not have any additional functions other than changing the rig state to show “Cementing”
Wireline – used when running wireline. Activity does not have any additional functions other than changing the rig state to show “wireline”
Rig Move – used when Rig moving. It does not have any additional functions other than changing the rig state to show “Rig Move”
BOP Testing – used when BOP testing. This activity does not have any additional functions other than changing the rig state to show “BOP Testing”
Zero
Cyberloop EDR offers Automated taring for Weight on Bit, Differential Pressure and Differential Torque.
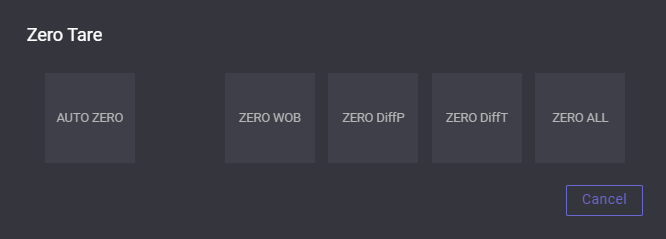
Auto Zero – uses the rig state parameters to auto tare the WOB, Diff P and Diff T.
Zero WOB - Press to manually zero only the WOB
Zero DiffP - Press to manually zero only the Differential Pressure
Zero DiffT - Press to manually zero only the Differential Torque
Zero All - Press to manually zero Weight on Bit, Differential Pressure and Differential Torque.
Other options:
set Horn Off/On;
reset Alarm;
add or remove Joint - by clicking on “+” the next joint in the list will be marked as a pipe moved down to the borehole in the tally sheet;
change Slip Status (Manual or Auto);
Open Quick Notes.
Settings
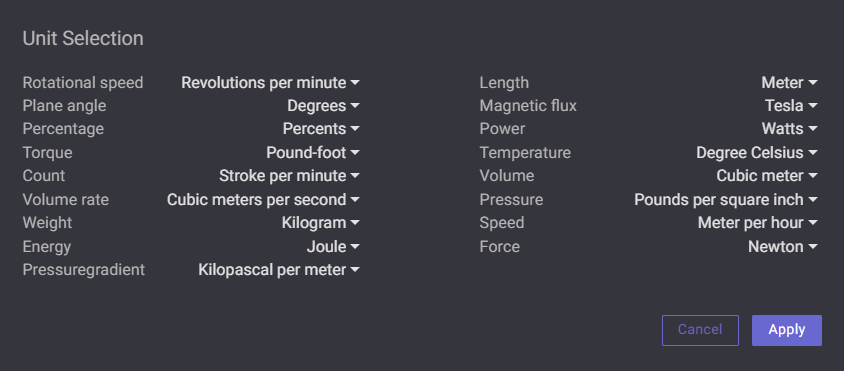
Click on the Settings expands dialog allowing to setup EDR environment: select theme and define the Units. To change the theme on the EDR environment from dark to light and conversely toggle the switch to the corresponding position.
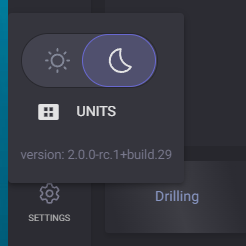
Click on units icon expands the dialog with Unit Selection. To change the measurement units for any parameter click on it and select it from the drop-down list. Click on Apply button to save changes.
User Permissions
There are three types of users with different rights available in the EDR application: driller, toolpusher, and client. Each type of user has a separate set of workspaces, which means that all workspaces created by driller users are not available for toolpushers, or clients and vise versa.
Driller | Toolpusher | Client | |
|---|---|---|---|
Common workspace | |||
Add traces on the right panel |  | | |
Delete traces on the right panel | | | |
Set hole/Bit depth | |  | |
Zero bit Wt | | | |
Add Joints | | | |
Drilling | |||
View personal workspaces | | | |
Create and edit personal workspace | | | |
View other users workspaces | | | |
Edit other users workspace | | | |
PVT | |||
View parameters | | | |
Set alarms | | | |
Set values to Zero | | | |
Setup the PITS | | | |
Daily Drilling reports | |||
View reports | | | |
Create/Edit/Delete/Release reports | | | |
Tally Sheet | |||
View tally sheet | | | |
Add/Edit/Delete tab with tally sheet | | | |
Add/Edit/Duplicate/Delet the Joint | | | |
Mark the joint as moved down | | | |
Alarms | |||
View active alarms and alarm logs | | | |
Notes | |||
Add quick notes | | | |
Add notes | | | |
Edit notes | | | |
Configuration | |||
Release/Edit/Start new section | | | |
Release/Suspend/Start new Well |
| | |
Setup charts | | | |
Export CSV/LAS file | | | |
Chat
Chat can be used for fast message exchange. Click on the chat icon on the top panel expands chat dialog. It can be opened from any tab.
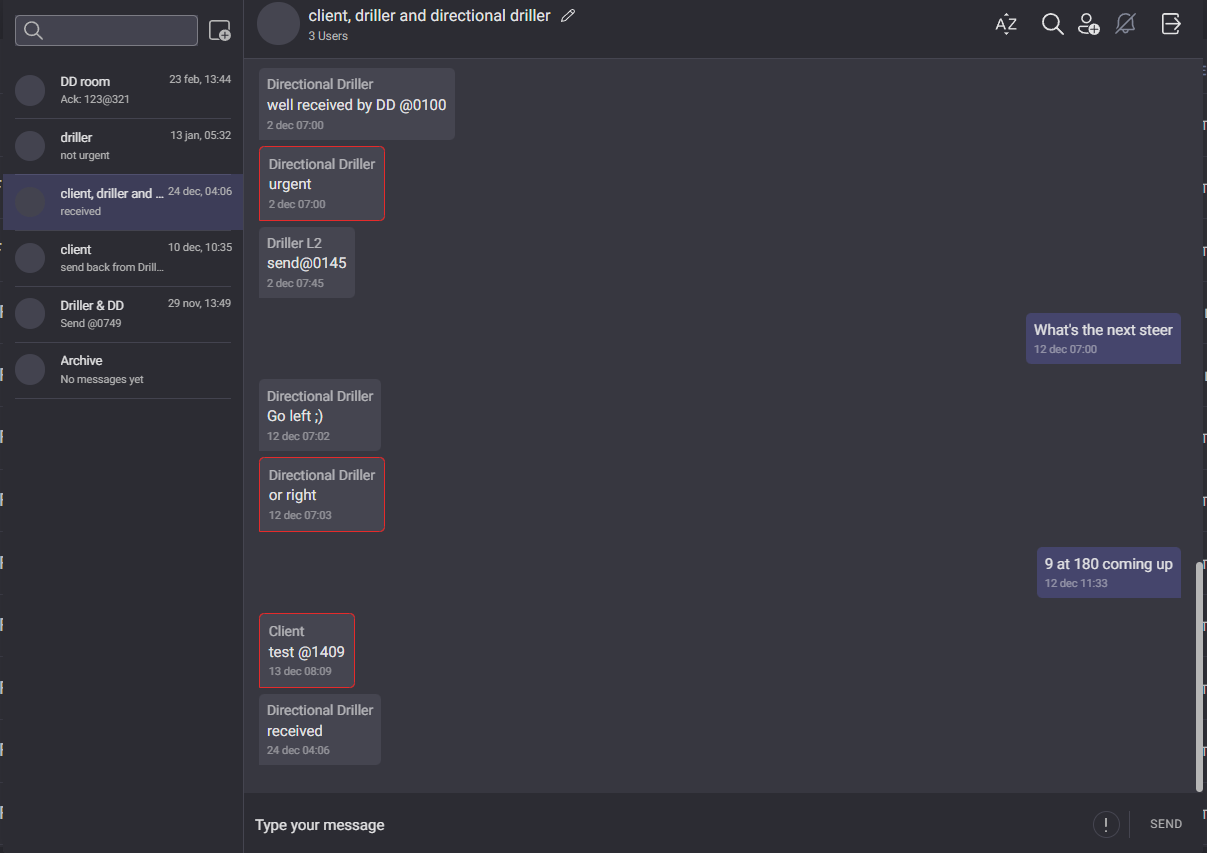
List of the existing chats placed in the left side of the dialog. Necessary dialog can be found in the search field. To start new chat with one or several users click on the new chat icon

on the top of the chats list.
In the opened dialog tick the checkboxes next to users that will be included to the chat and enter the name of the chat room.
On the top panel placed options of the selected dialog. Chat room name can be edited by clicking on the pencil icon next to its name. In the opened dialog new name can be entered.
Font size of the dialogs can be adjusted by clicking on the AZ button. Size of the text got changed by “+“ and “-“ controls. To leave the edit font size mode click on the AZ button.
Other users can be invited to the chat room by clicking on the “+“ button. In the opened dialog select users to invite and click on Start button.
Chat notifications got turned on/off by clicking on the Bell button.
The chat got closed by clicking somewhere outside the dialog.